

- Metacarpal Incision:
- always performed first, to ensure proper length of fixator;
- make longitudinal incision from base of 2nd metacarpal to its midshaft;
- terminal branches of radial sensory nerve can be identified & carefully retracted;
- dissect down to bone, and insert a self retaining retractor (Homan retractors may cause unnecessary soft tissue stripping;
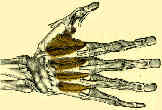
- to preserve saggital band and first dorsal interosseous aponeurosis, second metacarpophalangeal joint should be flexed to 90 deg;
- flexion causes the lateral band and interosseus tendon to move distally, thus minimizing the chance of trans-fixation;
- metacarpal phalangeal joint is held in flexion, placing intrinsic under tension, & first dorsal interosseous muscle is pushed in anterior direction w/ fingers to move it out of direction of external fixation pins;
- first dorsal interosseous muscle can be sharply elevated off base of index metacarpal, providing direct access and visualization of metaphyseal flare and proximal shaft of index metacarpal;
- Metacarpal Pin Insertion:
- proximal metacarpal half pin is inserted first;
- it is positioned close to base of bone on flare of the tubercle;
- position of fixator screw is at metaphyseal-diaphyseal junction;
- if proximal metacarpal pin is going to be placed at 45 deg angle, (piercing only 2 cortices, rather than the 4 cortices possible w/ straight lateral placement), then it should be placed thru cortical bone at the flare of the metacarpal base;
- consider angling pins away from each of at 60 deg for radial preloading, but if pins are to be inserted perpendicular to the metacarpal shaft, ensure that the proximal pin is not directed perpendicular to the metaphyseal slope (since this will cause the pin to be sloped relative to the diaphysis);
- finally, slightly adjust the pin direction so that it lies in the middle of the surgical wound so that there will be no skin tenting at wound closure;
- this step must be performed with all retractors removed from the wound;
- orthofix system:
- uses a drilling template for the metacarpals, thru which is inserted a drill sleeve and trochar;
- the trochar helps identify the center of the bone;
- once completed, the drill sleeve is replaced w/ a threaded screw guide;
- insert the half pin w/ at least 2 mm of protrussion of the distal tip thru the far cortex;
- conical half pins will not tolerated being backed out (due to conical shape);
- controlled axial preload (1.5 mm predrilling, insertion of 2.5 mm half pin) is optimal;
- in hard bone of young adults, predrilling w/ 2.0 mm drill bit is helpful when using 2.5 mm half pins;
- in soft bone, no predrilling is necessary for metacarpal pins;
- in older individuals predilling may not be necessary;
- pitfalls:
- note that the 1st metacarpal metaphyseal-diaphyseal flare is sloped relative to the diaphysis, and thefere, a standard two pin drill guide (like Synthes) will cause the pins to slope distally;
- if pins are sloped too distally, then reduction will be more difficult as the wrist is flexed (which causes the pins to slope even more distally);
- sloping of the pins is easily avoided, once its cause is recognized
- Reduction and Final Wrist Position
Biomechanical analysis of pin placement and pin size for external fixation of distal radius fractures.