

- Patient Position:
- ensure that patient has not rotated anteriorly, for this may allow acetabular component to be placed in retroverted position;
- ensure that patient's torso is not tilted inferiorly (as can occur from a bean bag), as this can cause reaming in an
excessive verticle position;
- Acetabular Exposure
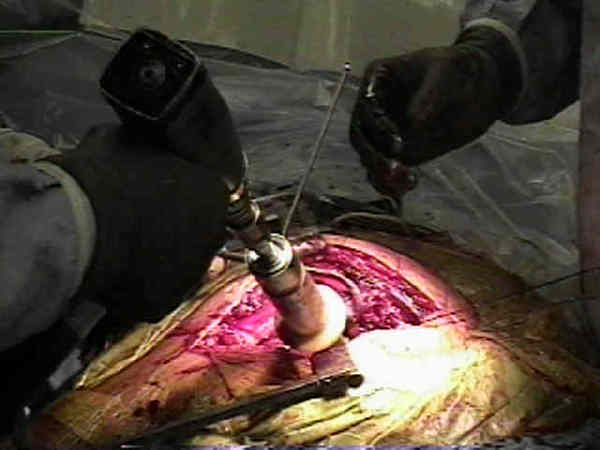
- an unobstructed view of the acetabulum is manditory;
- ensure that femur is retracted anteriorly to allow passage of reamers;
- if femur is inadequately retracted anteriorly, then it may force reamers posteriorly, and excessive
reaming of posterior column will occur;
- carefully dissect the transverse acetabular ligament from its bony attachments anteriorly & post
- keep the blade superfical, to avoid brances of obturator artery, which pass beneath it;
- Identification of Acetabular Floor
- Reaming Direction:
- component anteversion, adult femoral and acetabular anteversion, component insertion,
and component position);
- superior wall of the acetabulum is a slope that must be converted to a hemisphere;
- reaming is directed more against the medial and posterior wall than towards the acetabular roof;
- need to avoid plowing into the superior rim as larger reamers are used;
- goal is to avoid translating the center of rotation laterally or superiorly;
- usual goal is 20-30 deg of anteversion and 35-45 deg of abduction;
- w/ pt in lateral recumbent position after incision is made, one finger is placed in sciatic notch & one finger on
anterior superior spine;
- w/ methylene blue, line is drawn on drapes between these 2 points;
- one line was drawn between sciatic notch & anterior spine on the drapes and a 2nd orthogonal line was drawn and
flexed an additional 10 degrees;
- w/ osteoarthritis: reaming is directed more centrally rather than peripherally;
- protrusio:
- in severe acetabular protrusio reaming procedure is more aggressive and is directed peripherally and not centrally;
- therefore larger reamers and a larger cup is used;
- Reaming Depth:
- remember that the goal is to obtain near complete coverage of the acetabular component;
- initial medialization:
- central portion of acetabulum requires more reaming than periphery;
- to avoid superior placement of acetabular component, initial reaming is directed more medially;
- use true floor of acetabulum as marker for depth of reaming;
- reaming to depth that obliterates this U shaped portion of acetabulum (fovea) usually converts the bony acetabulum to
hemisphere;
- note that the fovea is often located posteriorly:
- hence initial medialization must be dead center rather than centered over the fovea;
- if initial medialization reaming is started too posteriorly, then subsequent reaming will follow a posterior path and may
ream out posterior wall;
- initial reaming is done w/ instrument about 9 mm smaller than templated size;
- as reaming nears floor of acetabulum, the subchondral bone will start to break up exposing cacellous bone;
- take care not to penetrate the medial wall, unless controlled penetration is necessary to obtain sufficient cup
coverage (medial protrusio tech);
- references:
- Benefit of Cup Medialization in Total Hip Arthroplasty is Associated With Femoral Anatomy
- Restoration of the centre of rotation in primary total hip arthroplasty
- cautions:
- if more bone must be removed from inferior margin of acetabulum, note occurance of significant bleeding
from obturator artery;
- dense sclerotic bone in one region of acetabulum may result in eccentric reamining and eccentric cup placement;
- a smaller reamer useful to remove small portions of sclerotic bone which is causing a malposition of the reamer;
- excess bone in inferior margin of acetabulum may later cause head of femoral component to become levered out of cup
superiorly during adduction;
- peripheral reaming:
- initial use of a large reamer can destroy the superior rim, necessitating a bone graft for adequate coverage;
- hence sequentially larger reamers are used to effect a controlled and centralized expansion of the acetabulum;
- w/ use of progressively larger reamers, one may find that transverse acetabular ligament is hypertrophic and must be excised to
allow larger reamers to enter acetabulum;
- elimination of sloped roof of acetabulum;
- larger reamers are inclined firmly under the superior aspect of acetabular rim to ream the bone to a hemisphere from its
normal sloped anatomy;
- careful not to remove bone from the superior rim at this step;
- when reaming the "sloped roof", the reamer should not engage the superior acetabular rim (because the reamer is engaging
the more medial roof instead);
- once the reamer begins to engage the superior rim, theoretically the roof is now a hemisphere;
- this step is especially important when under-reaming by 2 mm because failure to contour the flattened roof of the
acetabulum will result in incomplete seating of the acetabular component; (consideration for oversized components:)
- cautions:
- take care w/ use of a larger reamers as these can destroy superior rim, necessitating a bone graft for adequate coverage;
- surgeons gloved hand nearest to reamer exerts downward pressure (vector) so that the reamer does not skive upward;
- need to avoid damage to the posterior column w/ progressively larger reamers;
- w/ excessive anterversion the reamer will be directed into the posterior column and will "skive off" the anterior column;
- keep a slight anterior directed force on reamer so that it equally reams surfaces of anterior and posterior acetabulum;
- reaming subchondral bone:
- avoid reaming through the entire subchondral bone since this provides significant structural support;
- try to preserve subchondral bone, esp in superior aspect & periphery of acetabulum, but deepening acetabulum to obtain full
seating of cup in bone takes precedence over preserving subchondral bone;
- final reamer:
- final reamer size is determined by complete contact between the reamer and the acetabular rim;
- ensure creation of complete hemisphere:
- reamer 2 mm less than the intended cup size needs to be reamed 2-3 mm deeper than the peripheral edge of acetabulum;
- this helps ensure that the acetabulum is deep enough to fully encompass the cup;
- ensure that this reamer does not ream out the superior rim;
- consideration for oversized components:
- assess quality of subchondral bone:
- sclerotic bone circumferentially intact;
- dense subchondral osseous surface which is underreamed may not allow the acetabulum to expand around the cup;
- w/ hard sclerotic bone which is circumferentially intact around acetabulum, then 2 mm underreaming may not allow
proper seating of cup;
- reamer 1 mm less than intended cup size needs to be reamed 1-2 mm deeper than the peripheral edge of aceatabulum;
- this may partially disrupt ring of hard (inflexible) circumferential subchondral bone which will allow proper expansion
of the acetabulum around the cup as it is being inserted;
- careful not to ream out the acetabular roof;
- soft bone, subchondral bone partially reamed, no circumfertential sclertic bone:
- consider underreaming by 2mm, or press the 1 mm undersized reamer without reaming or with minimal reaming;
- when under reaming by 1 mm or with soft bone, use the last reamers in reverse in order to expand the acetabulum (and
compacting the underlying bone) w/o removing bone stock;
- consider prothesis with screws;
- references:
- The case for removing the subchondral bone plate in preparation of the acetabulum
- The value of preoperative planning for total hip arthroplasty.
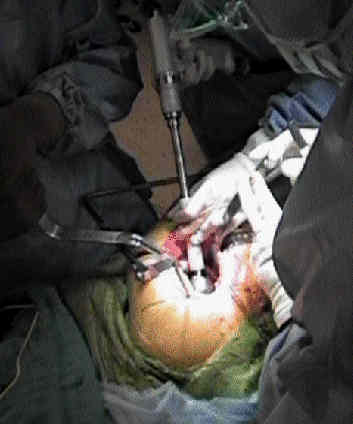
- Trial Shells: (acetabular component position)
- reaming is complete when all cartilage has been removed, reamers have cut bone out to periphery of acetabulum, and
hemispheric shape has been produced;
- trial shell that was either the same size as the final reamer or one size bigger is then inserted (depending on surgeon's goals);
- note final position of the shell in relation to the anterior and posterior walls (ie acetabular component position)
- look through the windows of the shell to make sure that there is a true deepened hemisphere (ensure that the superior roof is not
flattened or underreamed) which can block the compoent from fully seating;
- consideration for oversized components:
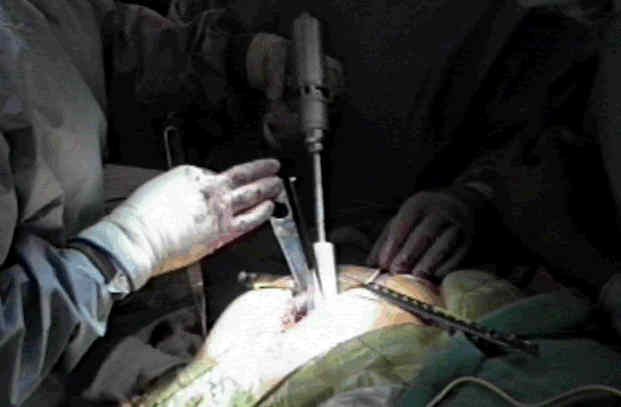
- trial prosthesis is placed & evaluated for fit;
- if this trial shell can be buried down to its base with hand pressure, then next larger size of trial shell is inserted;
- optimal trial size will not "bottom out" with gentle tapping of the mallet;
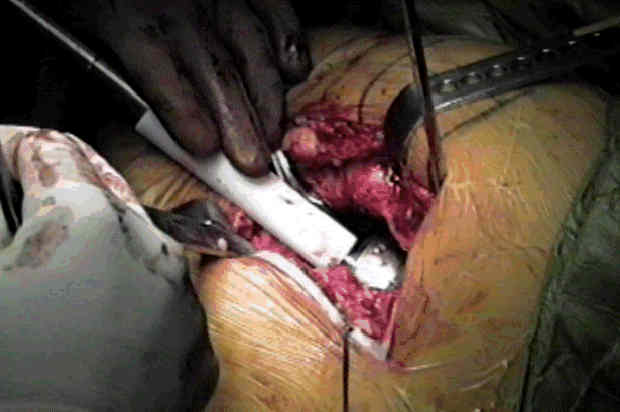
- final preparation:
- after trial placement, acetabulum is further prepared by removing any remaining soft tissue & clearing out bone cysts;
- fill cysts with reamed bone graft and apply reamer in reverse to help impact the graft;
- Component Insertion:
- acetabular component position
- consideration for oversized components
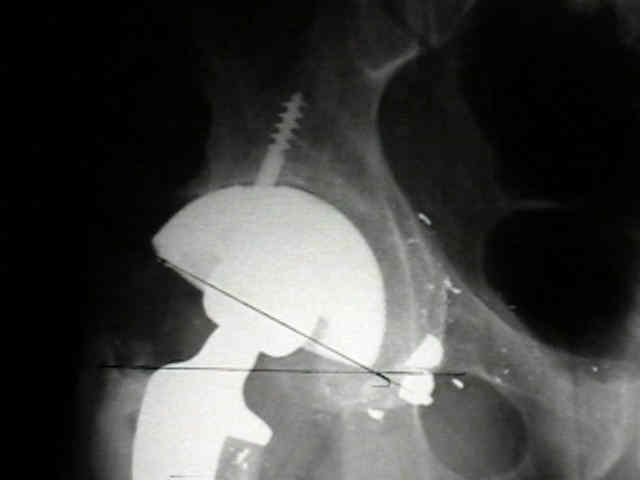
- Case Example:
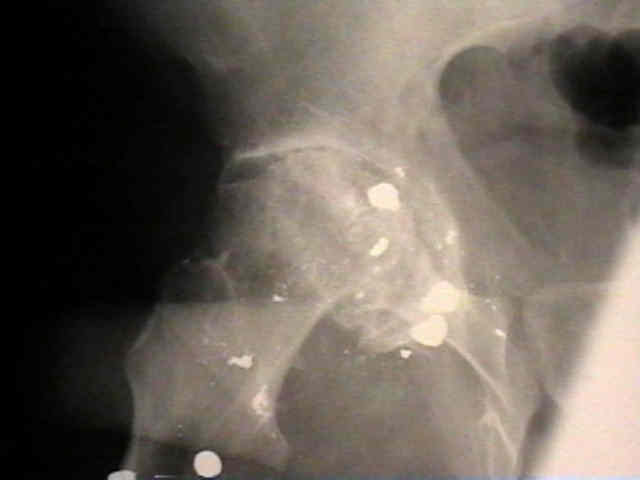
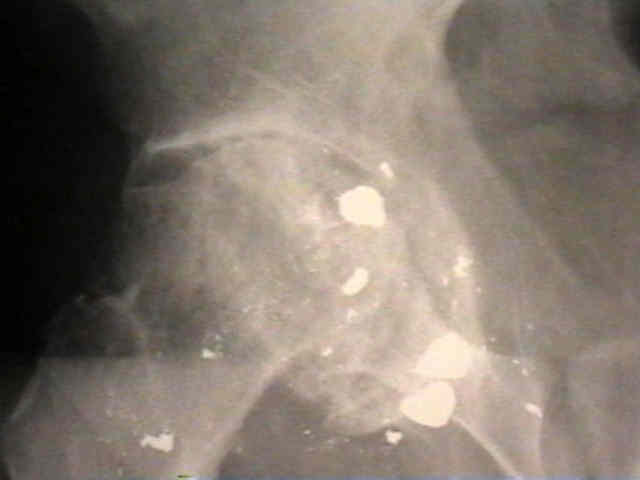
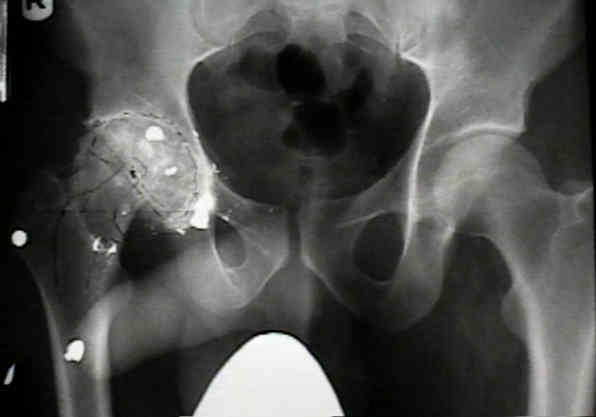
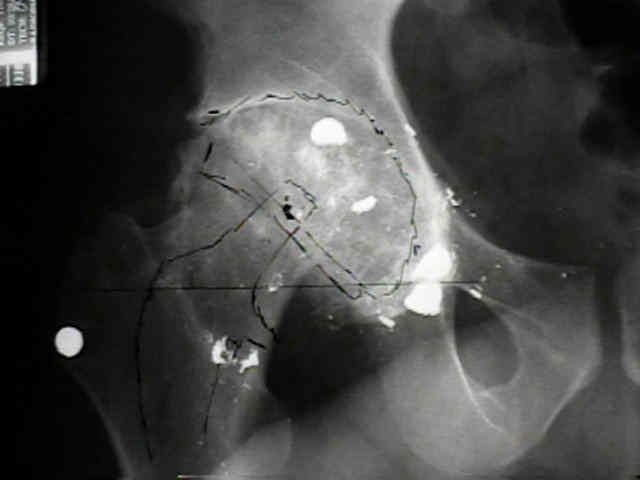
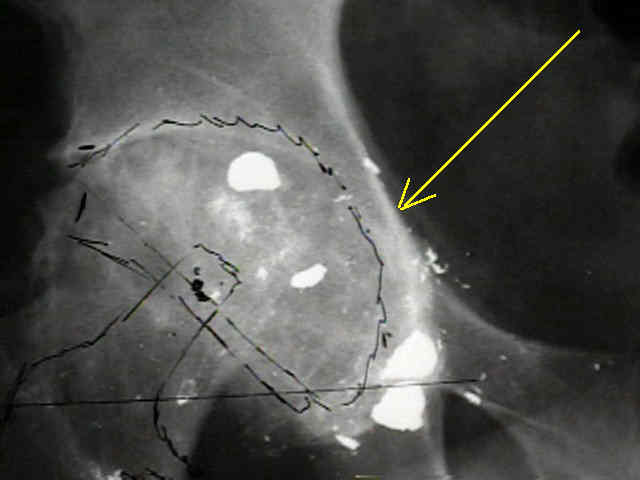
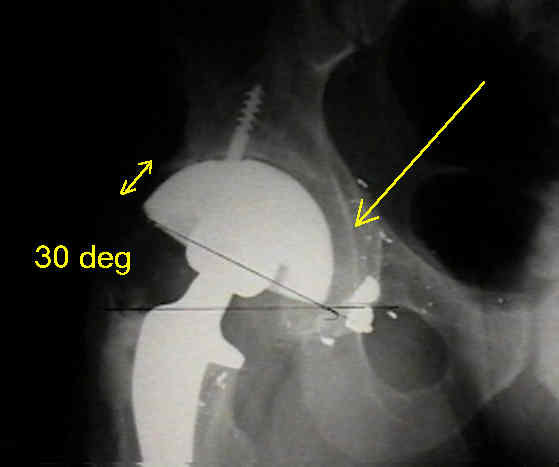
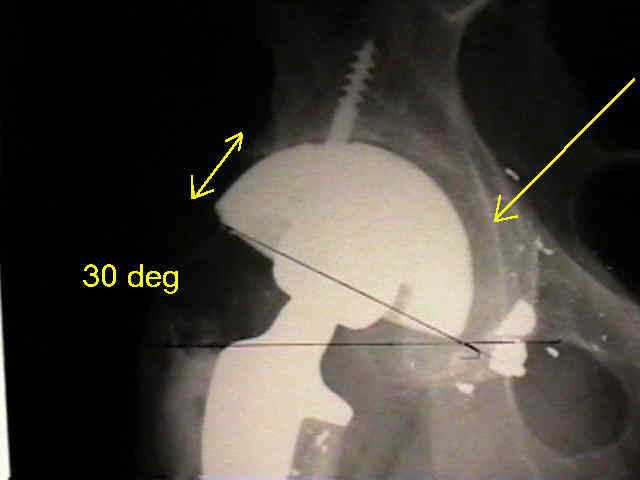
- 35-year-old male w/ near anklyosed hip following a GSW to the hip;
- preoperative films appeared to indicate that little or no medialization was necessary;
- postoperative films, however, indicate that the cup was lateralized (hence, reaming was inadequate)
Position, orientation and component interaction in dislocation of the total hip prosthesis.
Inaccuracy of acetabular reaming under surgical conditions.
Reamed surface topography and component seating in press-fit cementless acetabular fixation.
[Cementless socket fixation based on the "press-fit" concept in total hip joint arthroplasty].