
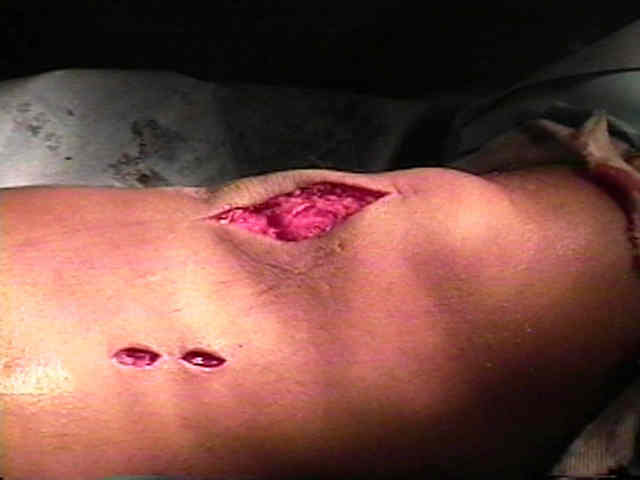
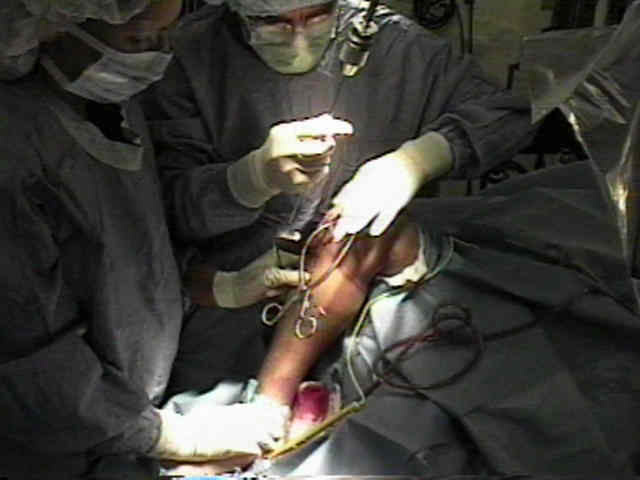
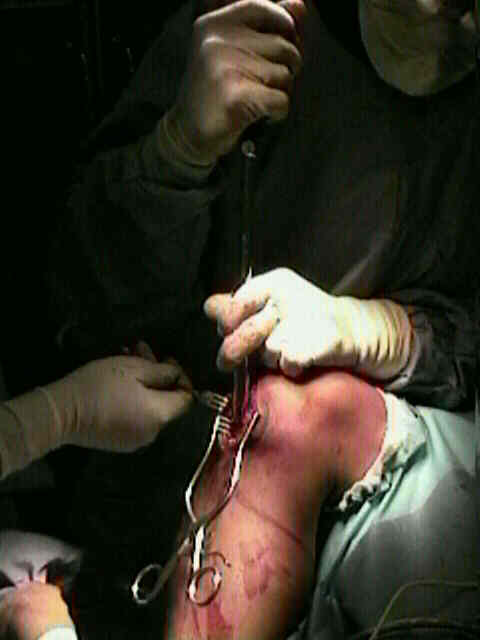
- Skin Incision and Initial Exposure:
- as noted by Keating, et al (1997), 77% of patients who had a mid-patellar tendon splitting incision had significant knee pain;
- in the report by Toivanen JA, et al (2002), the authors evaluated anterior knee pain in patients that underwent tibial
IM nailing using either a paratendinous approach versus a transtendinous approach;
- 14 (67%) of the 21 patients treated with transtendinous nailing reported anterior knee pain at the final evaluation;
- 15 (71%) of the 21 patients treated with paratendinous nailing reported anterior knee pain, and ten of the fifteen were impaired by the pain;
- the authors noted that a paratendinous approach for nail insertion does not reduce the prevalence of chronic anterior knee pain or
functional impairment by a clinically relevant amount after IM nailing of a tibial shaft fracture;
- references:
- Knee pain after tibial nailing.
- Anterior knee pain after intramedullary nailing of fractures of the tibial shaft. A prospective, randomized study comparing two different nail-insertion techniques.
- Anterior knee pain after intramedullary nailing of fractures of the tibial shaft: an eight-year follow-up of a prospective, randomized study comparing two different nail-insertion techniques.
- Influence of Nail Prominence and Insertion Point on Anterior Knee Pain After Tibial Intramedullary Nailing
- tourniquet:
- may be used during the initial exposure, since bleeding is often frustrating during this exposure;
- tourniquet should never be used during reaming of the canal (risks thermal necrosis);
- reference: The use of a tourniquet when plating tibial fractures.
- incision for midshaft and distal tibial frx:
- midline incision centered over distal pole of the patella down to the tibial tuberlce;
- lateral patellar tendon incision:
- advantages: allows better access to the starting hole position than the medial incision;
- use the knife to split through the lateral 1/3 of the patellar tendon;
- if necessary, the incision can be carried up proximally along the lateral border of the patellar (which may be required for
proximal tibial fractures in order to gain entry to the IM canal);
- medial patellar tendon incision:
- disadvantages: access to the starting hole is more difficult that with the lateral incision;
- incise thru the medial 1/3 of the patellar tendon with the knife;
- by splitting thru the medial portion of the patellar tendon (as compared to the medial tendon - retinacular junction), it is
easier to insert the guide pin in the correct central location;
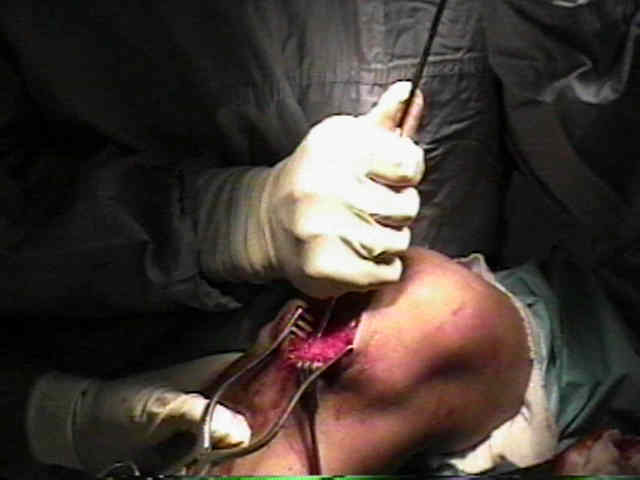
- proximal incision is carried only to deep fascia: knee joint is not entered (the fat pad prevents entry into the joint);
- distal incision is carried down to bone;
- infrapatellar fat pad:
- pushed proximally and posteriorly into knee joint w/ an elevator;
- anterior surface of proximal tibia is exposed;
- periosteum is reflected over a one cm diameter area after incising it with cautery;
- proximal tibial fractures: incision will have to modified;
- as noted by Tornetta and Collins (1996), proximal tibial fractures will require an extended medial parapatellar incision inorder
to achieve correct entry hole position;
- this will be similar to a TKR surgical approach:
- utilized an extended medial parapatellar incision, which allow slateral subluxation of the patella, and which allows a more
proximal and lateral starting hole to be achieved;
- by using this extended incision, hyperflexion of the knee was not required in order to achieve a proximal starting hole and to
keep the reaming parallel to the anterior cortex;
- note that hyperflexion of the knee tends to flex the proximal fragment which sends the nail towards the posterior tibial
cortex (which is the biggest pitfall);
- patient is position supine with the leg slightly flexed;
- mid-line incision is made from superior pole of the patella to the tibial tubercle;
- incise thru the medial 1/4 of the patellar tendon and continue this incision around the medial pole of the patella (upto
its superior border);
- retract the patellar tendon and the patella laterally so that the femoral trochlea is exposed;
- use flouro to mark out the center of the proximal fragment (AP view);
- direct the awl (or starting reamer) just in front of the trochlear surface;
- direct hand held reamers parallel to the anterior tibial cortical surface down to the frx site;
- take care that the jig apparatus does not injure the trochlear chondral surface as the nail is driven down;
- always drain the arthrotomy site;
- references:
- Semiextended position for intramedullary nailing of the proximal tibia.
- Entry Point:
- entry point lies along long axis of the tibia on anterior edge of tibial plateau;
- in the report by Tornetta P, et al (Orthopaedic Trauma Association, 1999), the authors note that the anatomic safe zone (lies on the
lateral plateau between the medial meniscus and the lateral meniscus;
- the authors correlate this anatomic landmark with a radiographic landmark;
- the authors noted that on AP radiographs the safe zone was in line with the medial aspect of the lateral tibial spine;
- on the lateral radiograph, the starting point is located at the anterior margin of the articular surface;
-McConnell T, et al., the authors wished to identify the radiographic correlate of the anatomic safe zone for tibial portal placement;
- safe zone for tibial nail placement as seen on radiographs is just medial to the lateral tibial spine on the anteroposterior
radiograph and immediately adjacent and anterior to the articular surface as visualized on the lateral radiograph;
- ref: Tibial Portal Placement: The Radiographic Correlate of the Anatomic Safe Zone.
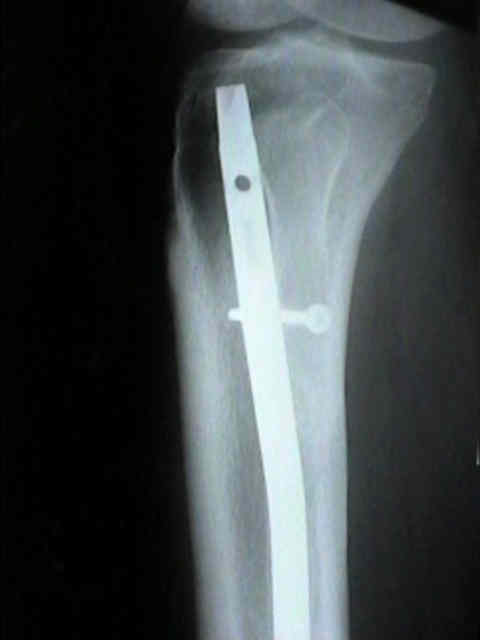
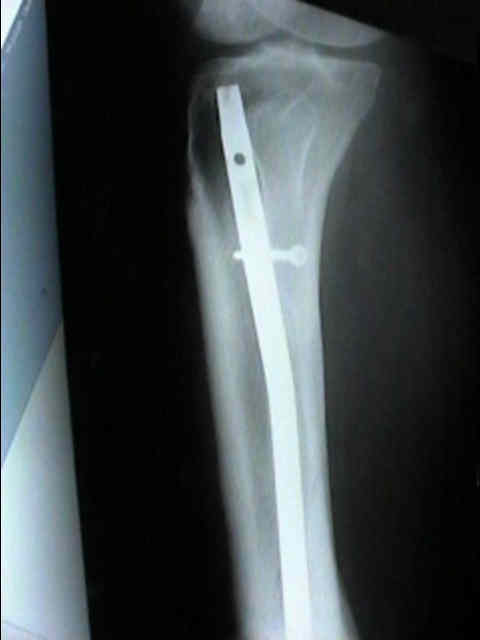
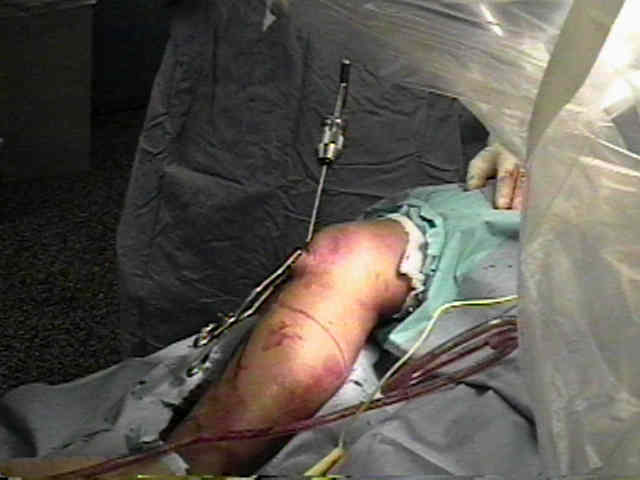
- using the universal Chuck with T handle or a cannulated power drill, insert 4.0 mm Centering Pin through the proximal
metaphysis and into 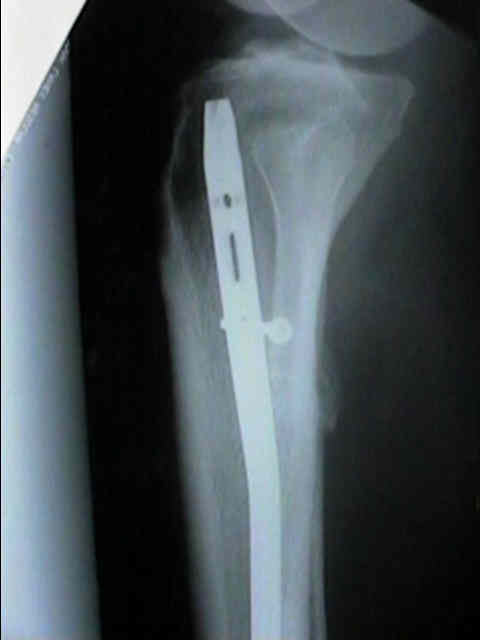 the meduallary canal, just posterior to the anterior cortex and closely approximating the 9
deg angulation of the tibial nail bend;
- a sterile nail may be held anterior to the tibia to act as a guide for placement of the centering pin;
- note: w/ proximal tibial fractures the nail insertion site is critical;
- insertion site needs to be more lateral than is usual, in order to avoid a valgus deformity and needs to be
inserted more posterior than is usual, in order to better direct the nail down the center of the meduallary
canal of the proximal fragment;
- pearls:
- hyperflexion of the knee actually makes the nail insertion more difficult;
- have the patient's leg resting on several "bumps" so that the tibia is elevated and knee is flexed about 45 deg;
- mid flexion of the knee allows enough room for nail entry and does not cause excessive patellar tendon tightness (which
can deflect the nail when the knee is placed in full flexion);
- hazards:
- be careful to avoid placing the entry point so far posterior that it enters the joint;
- ref: Proximal entry for intramedullary nailing of the tibia. The risk of unrecognised articular damage.
- RetroPatellar Approach:
- Radiologic outcome and patient-reported function after intramedullary nailing: a comparison of the retropatellar and infrapatellar approach.
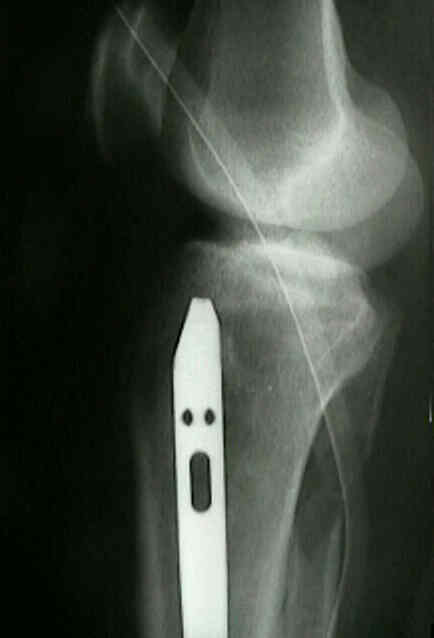
- Cannulated Cutter:
- pass the 11.0 mm Cannulated Cutter and Protection Sleeve over the centering pin with the longer
cutting edge positioned posteriorly;
- oscillate the cutter around the pin to carve an opening through metaphyseal bone and into canal;
- alternatively use the 13 mm Cannulated Drill Bit over the 3.2 mm guide wire from Titanium
unreamed Femoral Nail Standard Insertion and Locking Set, or use a smaller cannulated
drill from the ACL reconstruction set;
- initially the reamer is directed posteriory, however, as it is advanced, its direction is changed from posterior to anterior in order
to end up within and parallel to the meduallary canal of the shaft